How's you bathroom cabinet looking? If your bathroom cabinet is outdated, warped, or doesn't fit your current bathroom design, then a new one is exactly what you need. Installing a new bathroom vanity can completely refresh your space — improving both style and storage. Maybe installing a new bathroom vanity can be a big project, but you can successfully install it yourself as long as you carefully follow the instructions. In this article, you'll find a simple step-by-step installation guide, helpful tips, and our top-selling bathroom vanities that can enhance your bathroom's aesthetic appeal.
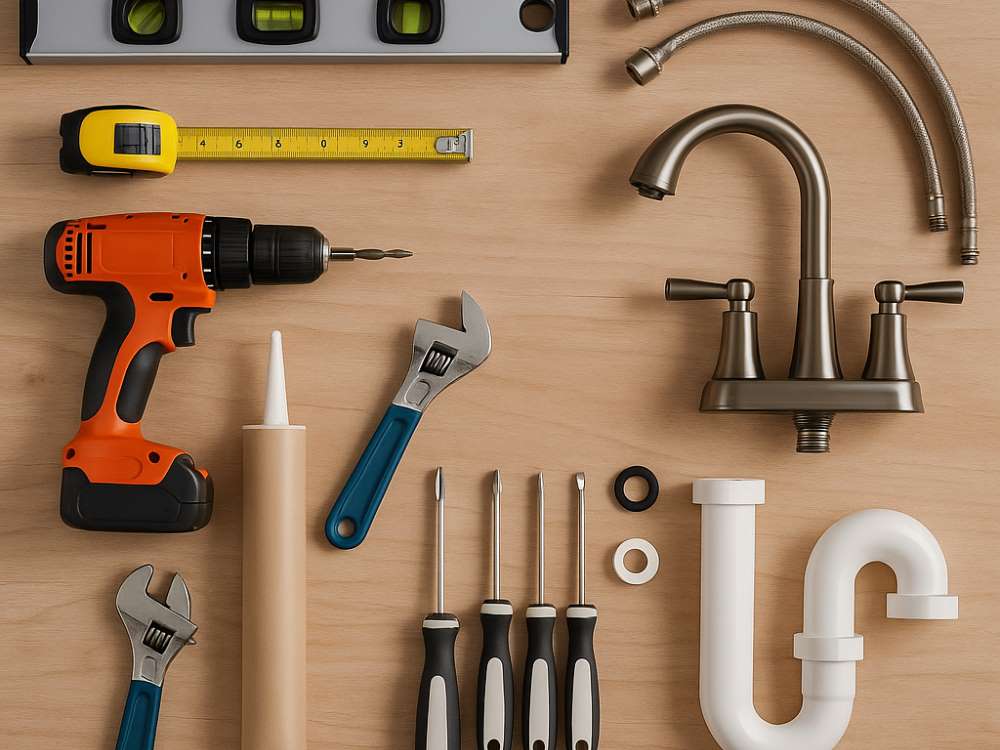
Before you get started, gather the right tools and materials — it’ll make the whole process smoother.
Basic Tools and Materials you Required
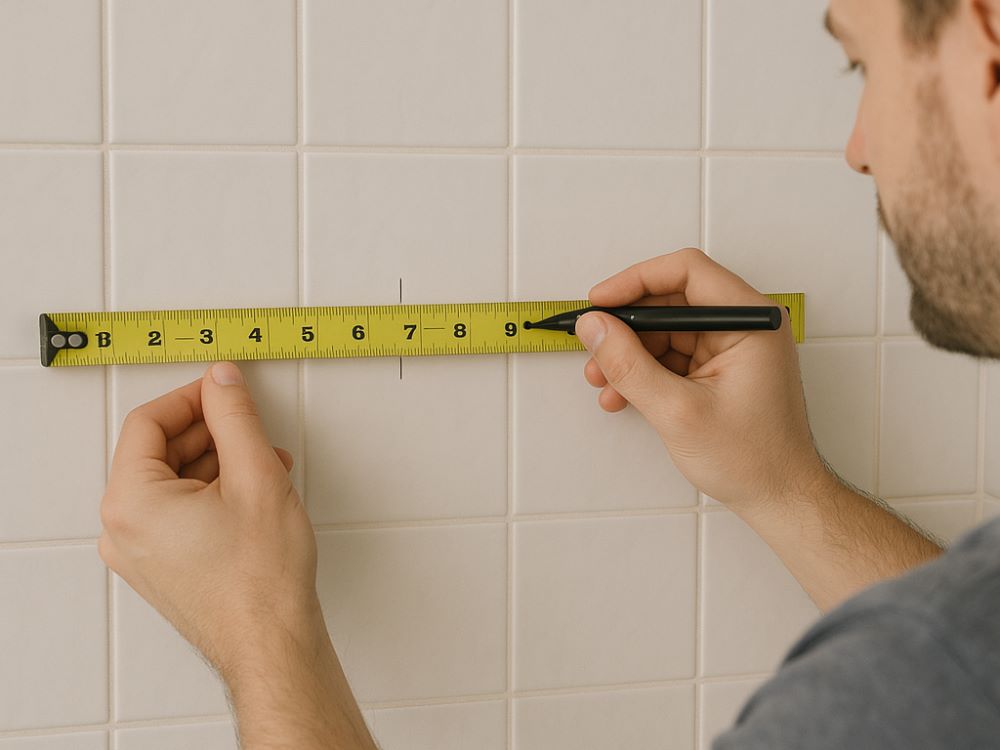
Measuring your space accurately is essential for guaranteeing your new vanity fits perfectly in your bathroom. Start by determining the width, depth, and height of your available area.
For effective space planning, measure from the wall to the desired vanity location, accounting for any plumbing or electrical outlets. Consider standard vanity sizes, typically ranging from 24 to 60 inches wide.
Use a tape measure and jot down your measurements, remembering to measure twice for accuracy. If you’re installing a double vanity, guarantee there's enough room for both units and the necessary plumbing.
With so many types of bathroom cabinets to select, choosing the right new bathroom vanity and faucet can greatly enhance both the functionality and aesthetic appeal of your bathroom.
When selecting, consider various vanity styles—like traditional, modern, or farmhouse—and match them with appropriate faucet types such as single-handle, double-handle, or wall-mounted.
Make sure the faucet complements the vanity’s aesthetic, ensuring a cohesive look. Prioritize durability and ease of maintenance when making your selections.
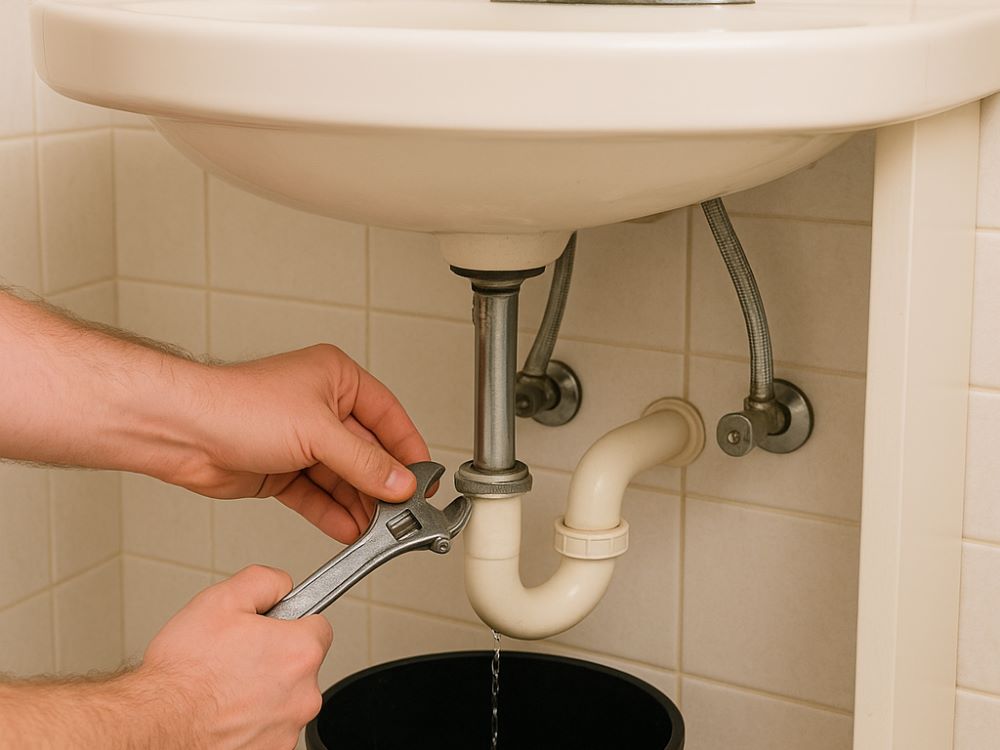
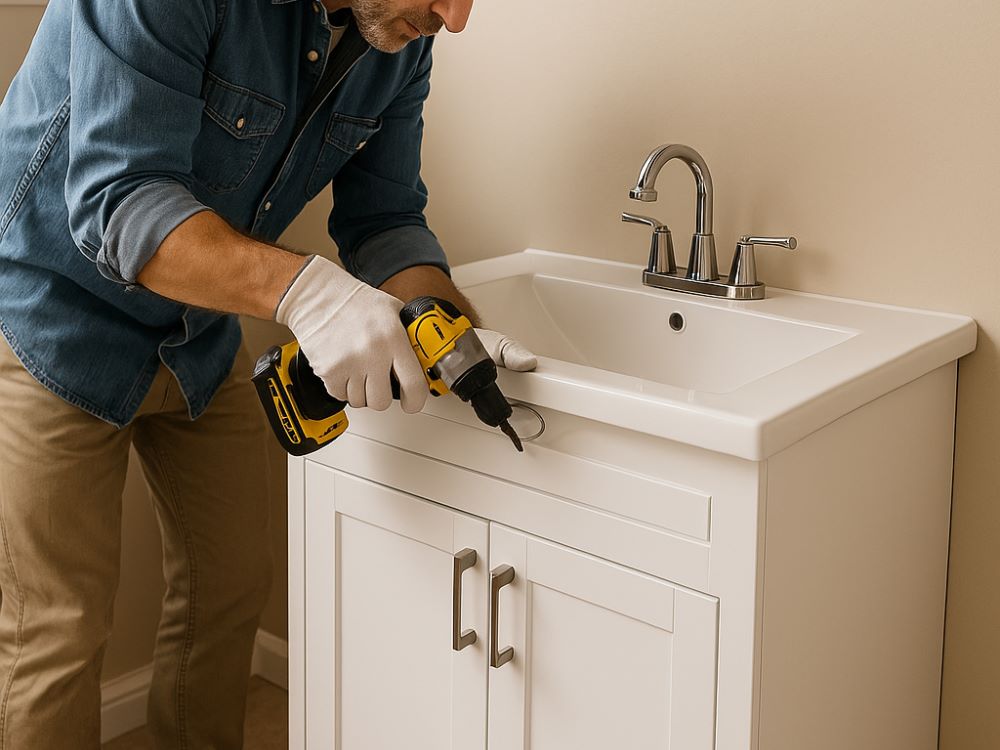
Before install a new bathroom vanity, you should disconnect the plumbing from your old vanity first.
After removal, patch or paint any wall damage to prepare for your new installation. This process guarantees a clean slate for your bathroom upgrade.
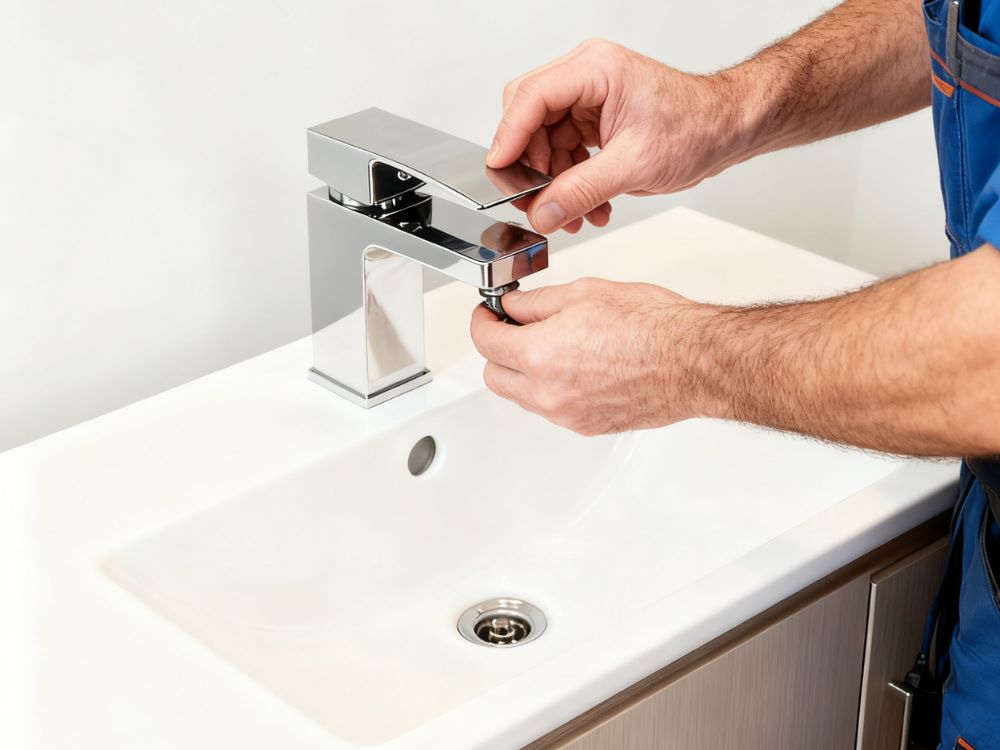
With the old vanity or pedestal sink out of the way, you're ready to install the faucet in your new bathroom vanity. Selecting the right faucet type that matches your sink and style preferences. For easier installation, attach the faucet to the sink before positioning it in the vanity. Confirm you have the necessary tools ready, including a wrench and plumber's putty.
Once installed, connect the water supply lines, and check for leaks to complete your faucet installation.
Proper wall preparation and vanity alignment are key to achieving a professional look. Follow these steps:
Taking these steps will help you achieve a seamless installation and enhance the overall appearance of your bathroom.
Position your new bathroom vanity carefully in the designated area, ensuring it aligns with the marks you've made for wall studs.
Tips: Remember, different vanity styles may require specific installation techniques, so refer to any included documentation.
This step isn’t mandatory but can enhance durability. Also, some of the vanities sold without countertops, you should install by yourself. Here’s how to secure your countertop effectively:
When reconnecting the water supply pipe and P-trap, first gather the necessary tools and materials, including wrenches and pipe sealing tape.
After all components are connected, turn on the water supply and check for leaks. Adjust the joints as needed to ensure a secure installation with no seepage.
At here, congratulations!
You have now completed the bathroom cabinet installation. Should you have any questions or require assistance during the process, please feel free to contact the Mirplus team. We are committed to providing you with prompt support.
At Mirplus, no matter what styles you are looking for, we have the option for you to choose. It’s time to explore some of our bestselling bathroom vanities that can elevate your space.
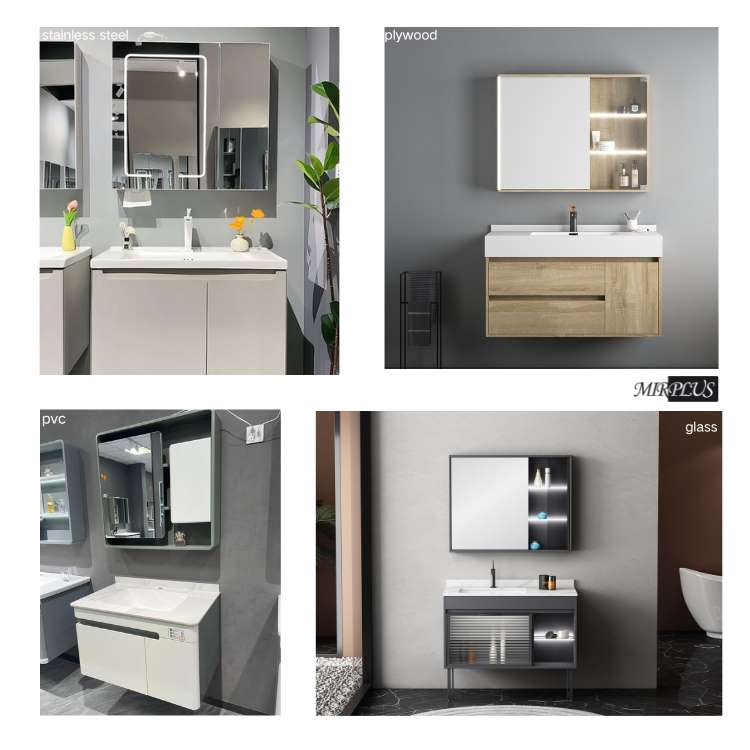
Each of these options combines style, functionality, and durability, making them top choices for homeowners like you. Here are three bestselling styles made from popular materials we have:
Our vanities come in a variety of materials, shapes and styles, choosing one of these vanities will guarantee your bathroom looks stunning and remains functional for years to come.
Installing a new bathroom vanity isn’t as hard as it seems — with careful measuring, the right tools, and a bit of patience, you can get professional results. Don’t rush the process; take your time to guarantee everything is level and secure. Enjoy your updated bathroom space, knowing you tackled the project with skill and confidence!
Q1. Can I install a new bathroom vanity by myself?
Yes, you can! Most homeowners can replace a vanity on their own with basic tools, patience, and careful measuring. Just be sure to turn off the water supply before disconnecting the plumbing and follow each step carefully to avoid leaks or uneven installation.
Q2. How long does it take to install a bathroom vanity and sink?
On average, installation takes about 2 to 4 hours for a single-sink vanity, depending on your experience and whether plumbing adjustments are needed. If your vanity includes a countertop and faucet, plan for extra time to align and seal everything properly.
Q3. What’s the best material for bathroom vanities?
Choose materials based on your bathroom’s humidity level and your design goals:
Q4. Do I need a plumber to connect the sink?
If you’re comfortable handling basic plumbing (supply lines and P-trap connections), you can do it yourself. However, if your bathroom requires new pipes or rerouting, it’s safer and faster to call a licensed plumber.
Q5. How can I keep my new vanity in good condition?
Q6. Does Mirplus offer customized vanities or OEM/ODM services?
Yes. Mirplus provides customizable bathroom vanities for small distributors and global partners — including design, material, and color customization to fit different markets and project needs.
Uncover a realm of opportunities.

Hi, I’m Emmy, a bathroom design enthusiast. My company Mirplus, backed by a team of professional designers, is dedicated to helping people select the perfect bathroom cabinets. I hope my articles can be helpful to you when choosing bathroom products in the future.
Copyright 2022 - All Mirplusbath

